Marketing Smart with Einstein Analytics – Part 3
In the last two parts of this blog series we explored how to get data from Marketing Cloud into Einstein Analytics, we even looked at taking those hidden data views and bring them in, because let’s face it that is key details any marketing organization wants to report on – if you missed it here’s part 1 and part 2. But the big question now is what do we do with this replicated data? I mean no user can actually use this data yet since we haven’t created any datasets. Also, the replicated data extensions do not make much sense in itself; for instance, we do not know the email subject of an email click just by looking at the click replicated data. This part 3 will explore how we can create a dataset from multiple data extensions with the user of the Einstein Analytics data flow.
Know the Data Model
When you are working with data flow it is absolutely crucial that you know the data, the grain and keys you can use when augmenting your data. If you don’t understand the data then the chances are that you won’t get a meaningful output of your data flow. The dataset we want to create in this blog is one to illustrate the open and click activities. Remember if you have a specific use case from the marketing organization make sure you understand what they want to see in their dashboard and then start looking at the data you have available, you may have to structure your dataset in a different way.
In order to create the open and click activities dataset you need to make sure you have replicated the following data extensions from Marketing Cloud:
- Open
- Clicks
- Job
If you don’t have those data extensions available in Einstein Analytics make sure to follow the steps in Part 1 to set up the connector and part 2 to make the hidden data views available for the connector.
Build the Data Flow
In Einstein Analytics navigate to the Data Manager by clicking the gear icon in the top right corner in Analytics Studio.

Once there navigate to the data flow by clicking ‘Dataflow & Recipes’ on the left menu.

Now choose the data flow you want to use – or you can always create a new data flow as well. In my case, I already have a Marketing Cloud Dataflow that I can use for this purpose. If this is an existing data flow you may want to take a backup of it before making any changes.
Get the Data
The very first thing we want to do is extract our data from the replicated data extensions. Since we are taking data from a connector we need to use the ‘digest’ function. So click on the digest function to create your first node.
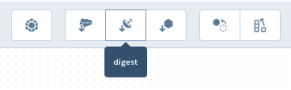
We want to give the digest node a name I have called it ‘Open’. Then choose the Connection Name, which is the name of your connection to Marketing Cloud. From the connection we want to choose the ‘Source Object’ which is the Open data extension; in Einstein Analytics it’s being renamed to ‘Ungrouped__Open’. Finally, you need to select the fields from the replicated data extension that you want to include, I’ve selected all the fields. Once you have all that hit ‘Create’.

We now need to do the same for the Click replicated data extension. Here I will also select all the fields, so it should look something like below.

And finally, we need to create the digest for the Job replicated data extension also including all the fields.

Define Activity Types
With all the data available we need to start thinking about bringing the data together. I know that my Open and Click data extension somewhat contain the same details by checking out the data view documentation. Further, I want my dataset to contain information on activities, so I want each row to symbolize an open or a click activity and therefore it makes sense to do an append function. However, knowing my data there is no field in the Open or Click data views that say what activity it is as it is split on a replication level. In other words when I append my Open and Click I don’t know which is which. In order to distinguish what is a click and what is an open activity, we need to create two compute expression transformation that does just that.
In the transformation menu find the computeExpression button and click it.

The first computeExpression we will create is to have Open as the source so we can say that these activities are open activities. So call your new computeExpression node ‘OpenActivity’ and choose ‘Open’ as the source.

Next, we need to add the new field we want to use. So click on ‘+ Add Field’ and give your new field a name and label; I’ve called mine ‘IsOpens’. You want to keep ‘text’ as the data type as we will be expecting a ‘true’ value in the field.

Finally, we need to add our SAQL expression. We could write a fancy SAQL statement, but in reality, we know that every single row from the source is an open activity. So we can pack the fancy SAQL statements away and just type “true”. We need the double quote to indicate that this is a text string. Once done you can hit ‘Save’ and ‘Create’.

Next, we need to do the same but for the Click digest. So create a new computeExpression and call this one ‘ClickActivity’ and choose ‘Click’ as the source.

Similarly to before click ‘+ Add Field’ and give the field the name and label ‘IsClicks’, keep the data type as text and add “true” in the SAQL expression.

We now know what each digest as we have defined that in the computeExpressions, so now we can move on and start bringing the data into one instead of three different digests or data extensions. In the meantime, your data flow should look like what you see below.

Bring the Data Together
As mentioned in the previous section we want to append the Open and the Click digest, meaning we want them to the opens and clicks to be individual rows in the same table. We also want some more details about the activity for instance what was the subject of the email the user clicked or opened which we will get from the ‘Job’ digest. We will use two transformations the ‘Append’ and the ‘Augment’ to bring all the data together.
First up we need to append the Open and the Click data by clicking the ‘Append’ transformation in the menu.

All we have to do in this node is, of course, give it a name ‘AppendActivity’ and define the data we want to append by choosing the source, which is our two new computeExpression nodes ‘OpenActivity’ and ‘ClickActivity’. Finally, we need to make sure that ‘Allow disjoint schema’ is checked as the two sources are not identical. First of all, remember that out computeExpression is generating a field that is unique for that source on top of that looking at the data view documentation the ‘Click’ data contains information about the URL clicked, which you do not have in the Open activity data. Note that I can do an append transformation because my field names in each source are identical.

Once done you can hit ‘Create’.

The final step to bringing all the data sources together is to joining our new append node with our Job data. The ‘AppendActivity’ will be the left key as this is our lowest grain or root information and the job is our right key. Again knowing my data I know that my Open and Click data has a reference to a ‘JobID’ which is the same id you will find in the Job data.
To join the data together click the ‘Augment’ transformation in the menu.

First of all, make sure to name your node ‘AugmentActivityJob’. Then choose ‘AppendActivity’ as your ‘Left Source’ and ‘JobID’ as the ‘Left Key’.

When we have defined the left part of the augment we need to look at the right side. First, the ‘Relationship’ should be ‘JobDetails’ its basically just a description. The ‘Right Source’ is as mentioned the ‘Job’ node and the ‘Right Key’ is the ‘JobID’. Finally, you need to pick the fields you want to bring in from the right source. You can pick all or a few of the fields, but I wouldn’t pick the right key as that would be a duplicate of your left key. Also if you only select a few you probably don’t need to include them in the Job digest node unless you use them for something previously to augmenting your data.

Once all your fields have been selected click ‘Create’. Now you will see all three data sources have been brought together.

Clean up and Register Dataset
Nothing is a dataset just yet. In order for us to actually generate a dataset, we need to register it. But before we want to do that we want to clean up our fields a little bit. First of all, the activity type is split in two fields ‘IsOpens’ and ‘IsClicks’ which makes groupings in Einstein Analytics a little hard, so we want to join that information into one field. Second of all, we probably want to drop a few fields that we no longer need.
In order to have just one field that describes the activity field, we want to create another computeExpression. So once again hit the ‘computeExpression’ button in the menu. Give your new node the name ‘Activity’ and choose ‘AugmentActivityJob’ as the ‘Source.

Now hit ‘+ Add Field’ to create a new field. We will give the new field the name ‘ActivityType’ and keep the Data Type as text. This time around we want to use a case statement for our SAQL expression, so add the following.
case when 'IsOpens' == "true" then "Email Open" when 'IsClicks' == "true" then "Email Click" else "Null" end
All we are doing in the case statement is to reference the other computeExpressions we created earlier saying if ‘IsOpens’ has the value true then return ‘Email Open’, if ‘IsClicks’ is true then return ‘Email Click’ and finally is none of that is the case then just put the value null. In reality, null should never be an option as our rows from the source data will always have true in the computeExpressions we created.

Make sure to save your field and create the computeExpression by hitting ‘Save’ and ‘Create’.

Since we have the new ‘ActivityType’ field we no longer need ‘IsOpens’ and ‘IsClicks’, so why keep them in the data set? I have no reason, so let’s add a new transformation that will allow us to drop those two fields. In the menu find and click the ‘sliceDataset’ transformation.

No surprise we first need to give the node a name, so let’s call it ‘DropCEFields’. We also need to choose the source and this time we will pick the ‘Activity’ node. We can now either choose to keep or drop fields from our source node, in this scenario it’s easier to drop fields since we want to keep everything but two fields ‘IsOpens’ and ‘IsClicks. Next chose those two fields in the ‘Fields’ section.

With that done we can finally register our dataset, so we can explore our activity data. So click the ‘sfdcRegister’ transformation.

Again we need to give our node a name, so type ‘RegisterMCActivities’ in the ‘Node Name’. The ‘Source Node’ is the slice node we just created. Finally, give your new dataset the ‘Alias’ and ‘Name’ ‘MCActivities’ and hit ‘Create’.

Now your dataflow should look something like mine below.

Run Your Dataflow
Before we can use our new dataset we need to hit ‘Update Dataflow’ in the top right corner and accept that it will overwrite the current data flow. It’s always best practice to have a backup if something goes wrong.

This action will only save your data flow, so in order to actually see the result within Analytics Studio hit the same button which now has changed to be ‘Run Dataflow’.
Once your data flow has successfully run you can go to Analytics Studio to explore your new dataset.

Taking Your Data Flow Further
This blog covered how you can combine data from three different data extensions into one dataset. Let’s be honest it’s a simple use case, but nothing stops you from taking it further. Personally, I would combine it with my Salesforce data to get more rich information about my audience. If you are using the Salesforce Marketing Connector to bring data from core Salesforce into Marketing Cloud then your Marketing Cloud subscriber key would most likely be the same as your Salesforce id, so you can use that when you augment your Salesforce data. If you come up with some cool use cases please do feel free to share by dropping a comment below, I would love to hear about it.
I have the following B2C use case : 8m customer records (person accounts) stored on premise database and have the need to relate many customer records to build a household relationship. By doing that I can effectively target households in the Marketing Cloud. Is Einstein a good environment to build the household relationship? In other words can we run jobs on Einstein that can mark the customer records as a household match based on criteria, email, first name+last name, email+ first name+last name etc Is 8M records a performance concern. Alternatively, is Marketing Cloud an alternative to Einstein? Or Should I consider a data warehouse solution for this use case ?
Hi Rikke, I have successfully implemented till Part -3 of this series. My use case also need Send, Bounce and Journey Data into the Einstein Analytics Dashboard. Could you guide me to have these data also on to the EA dashboard.
Any MC data view is brought in the same way as described in the blog. The requirements will shape how you model your dataflow, but you can bring the data views from the connector in using the digest node.